We live in the land of sugar sand. Sand so fine that it’s almost impossible to keep from tracking it indoors.
After we bought our house, we found that we were having to vacuum the kitchen — (which was the room we entered from the back door) – every few days. That got really old. Really, really fast.
I never thought I’d need or want a mudroom. I thought mudrooms were needed just for snowy, muddy areas. But it occurred to me that this might just be the solution for our almost daily cleaning predicament.
So, my husband and I started discussing adding on a small mudroom to the back of our house. Last summer when it was time to start our window, insulation and siding replacement project, we knew that the time was then or never to build on a small mudroom.
We knew we wanted the room to be large enough to be functional and roomy enough, but small enough to keep costs low. We knew we had plenty of reclaimed lumber from our very first old home salvage project to cover most of the material costs, but we knew we would still had to factor in other expenses like labor, electrical supplies, lighting, insulation, roofing, and yes, more lumber.
After we considered everything, we realized that the pros far outweighed the large con of having to clean the floors every other day, so build it we did.
We finished the addition months ago, but have taken our time furnishing and finishing it.
(When you’re salvaging old houses 5-6 days a week, there’s not a lot of time or energy left over. So frustrating when you’re wanting to get some home improvement projects done!)
Plus, I wanted to find the perfect antique bench, and while I wanted it to appear instantly — (Yeah, I am impatient sometimes) – it took months to find.
Today is the big reveal.
But, let me start from the beginning.
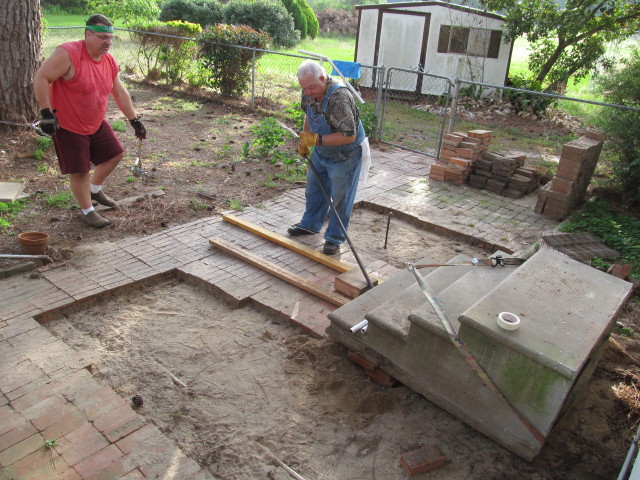
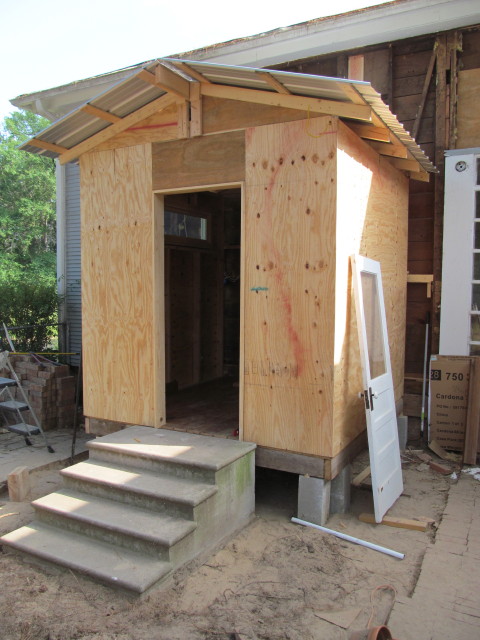
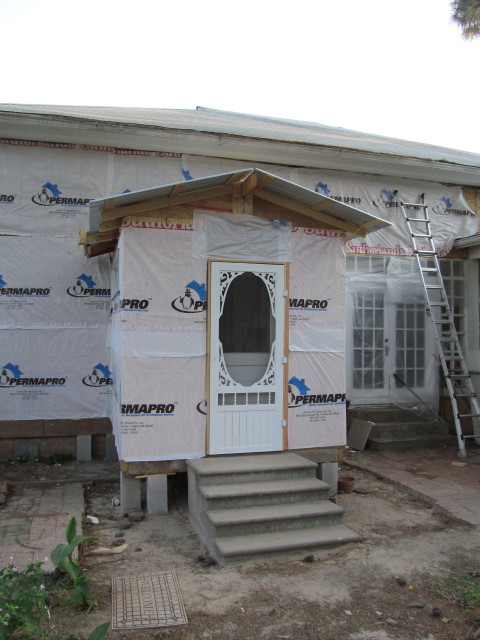
First we moved the concrete steps using ingenuity, a homemade track system, a conveniently located tree, and a come-along.
I moved and stacked the bricks to get them out of the way …. finding a few scorpions and black widow spiders in the process!
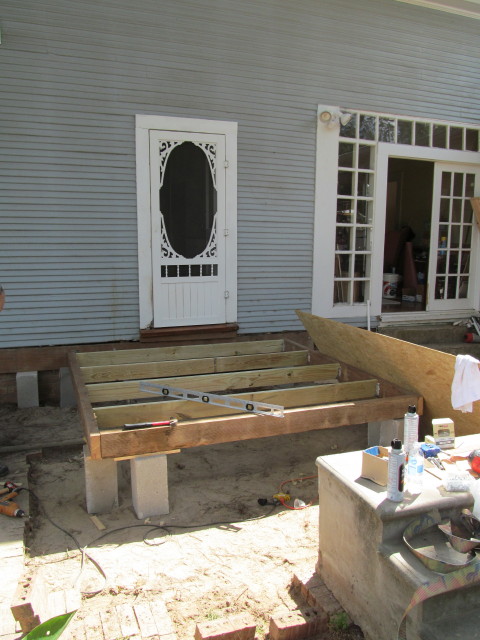
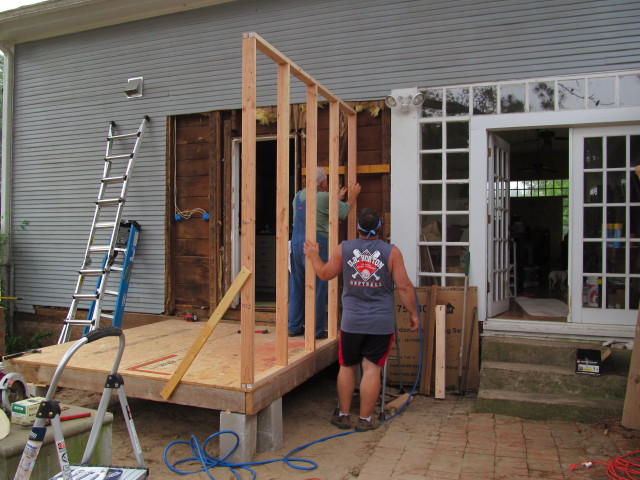
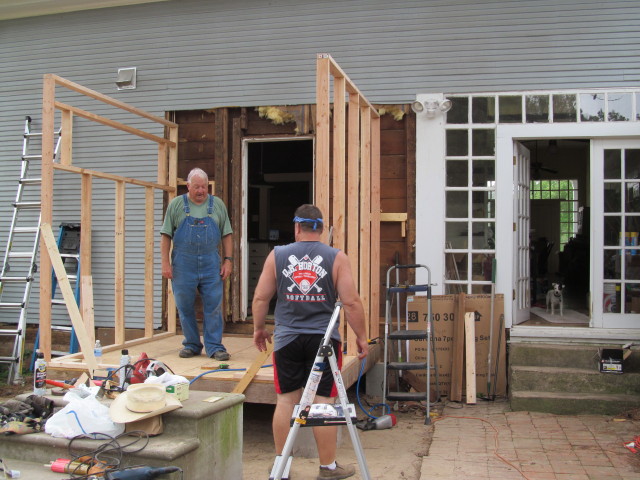
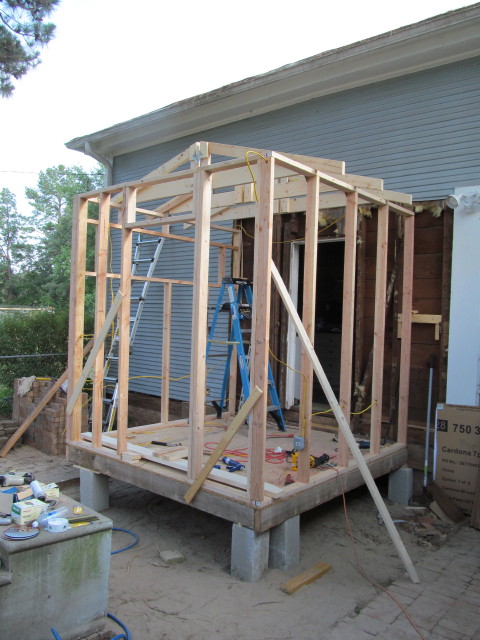
After that, my husband, Mark, and a good friend, Mike Cochran, started the decking and framing process.
To add some natural light, we decided to install a window on the east side of the mudroom. I didn’t want the small room to feel like a cave.
After the wall framing was done, we hired an electrician to do the rough-in work.
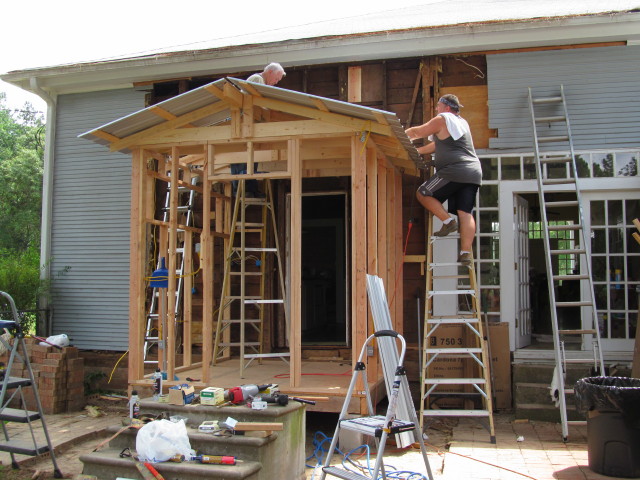
Next, the guys installed a metal roof.
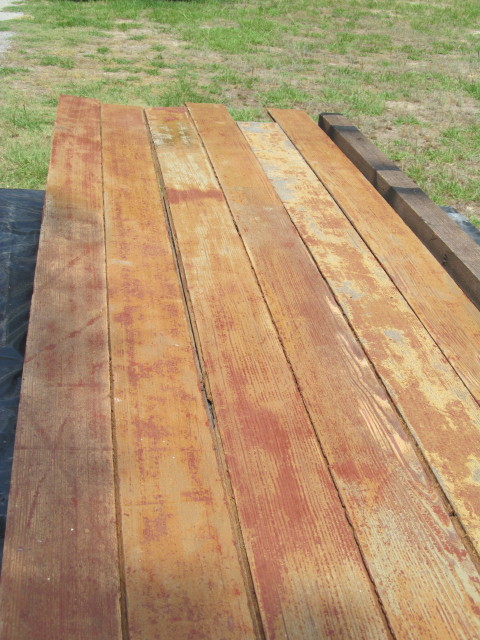
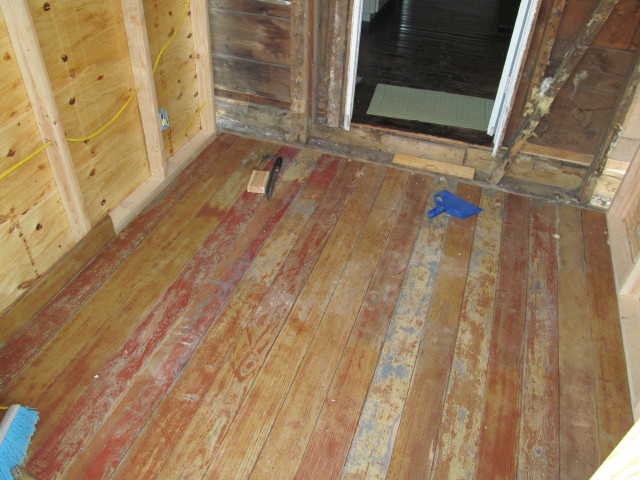
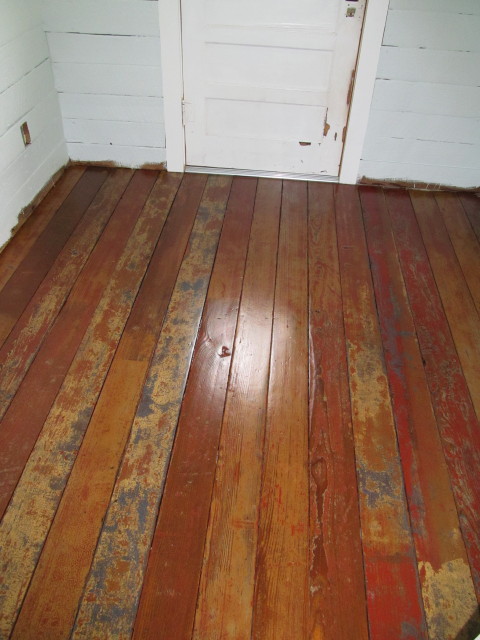
Meanwhile, while the guys were doing the framing work, I sanded and cleaned the old pine hardwood floors that we pulled from an old, abandoned house in Grapeland.
My intent was to sand them all the way down to bare wood. However, sanding them revealed many layers of wonderful old blue, red, orange, and yellow paint. I decided to leave them that way. Each plank is so lovely in its own way.
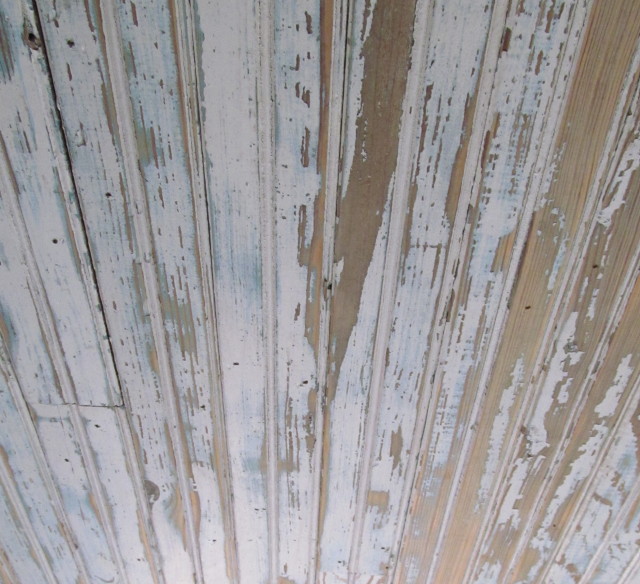
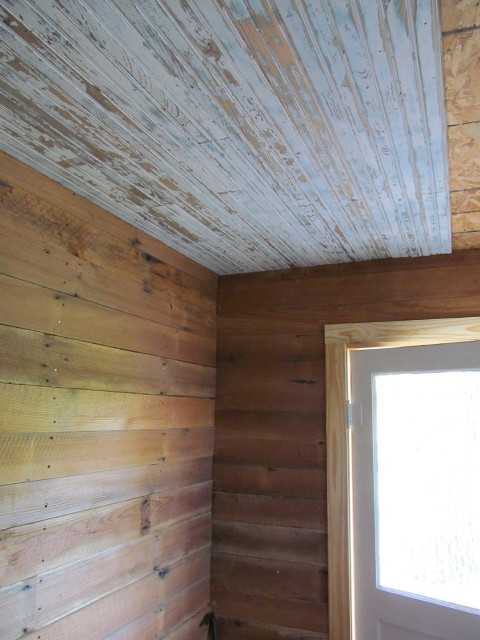
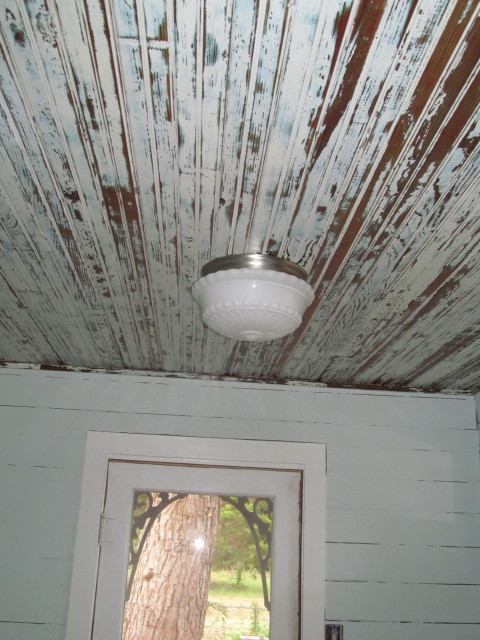
I did the same thing with the old, white beadboard that we wanted to use. The old white paint was horribly flaky so sanding them was a must. Sanding them revealed a lovely blue paint underneath and sometimes bare wood.
(Not the greatest photo, but you get the idea.)
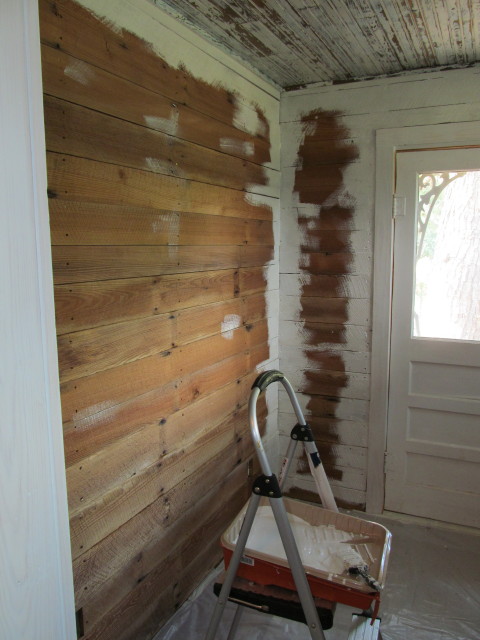
I also scrubbed the filthy shiplap using a bucket of mild, soapy water and a garden hose and let it all dry in the sun.
All of the above would be used for the finish-out.
One day I went to town to buy groceries and the guys had surprised me by installing the finished floors. Admittedly, I was a tad perturbed because I wanted to be part of that process. Heck, after all that work, I wanted to help choose the boards that were installed.
But, I have to say they really didn’t need my help. They did a great job!
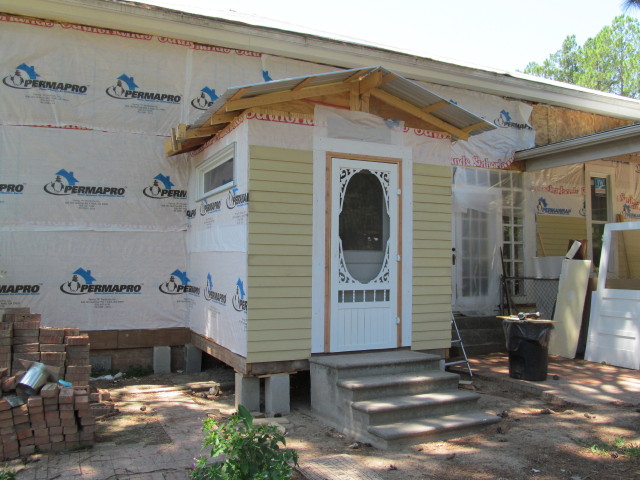
Next they moved the concrete steps back into place. They also installed the window and clad the mudroom in plywood ….
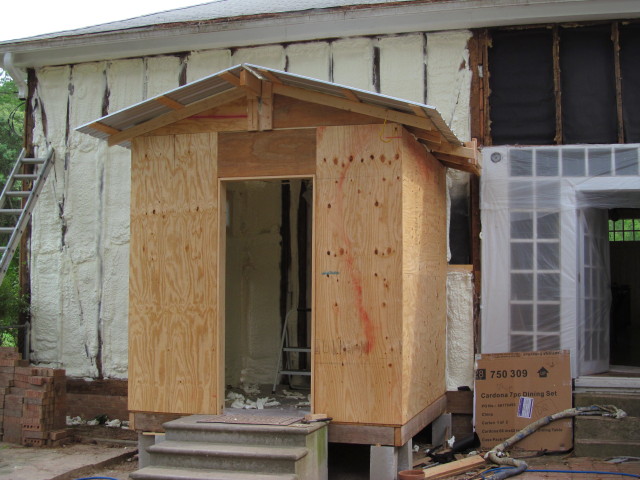
Then it came time to have the insulation company do their thing, not only to the mudroom but the rest of the house.
After that, the guys stapled up a vapor barrier and installed the doors.
We clad the entire house in HardiePlank smooth siding. We chose their 4″ reveal product because it matched almost exactly what was on the house originally. And, HardiPlank siding is so maintenance-free — it holds paint so well! — plus we knew it would help with our homeowner insurance. (Some insurance companies consider it to be a masonry product, and masonry costs less to insure than wood.)
With the exterior work done, the more fun (to me) finish-out process began.
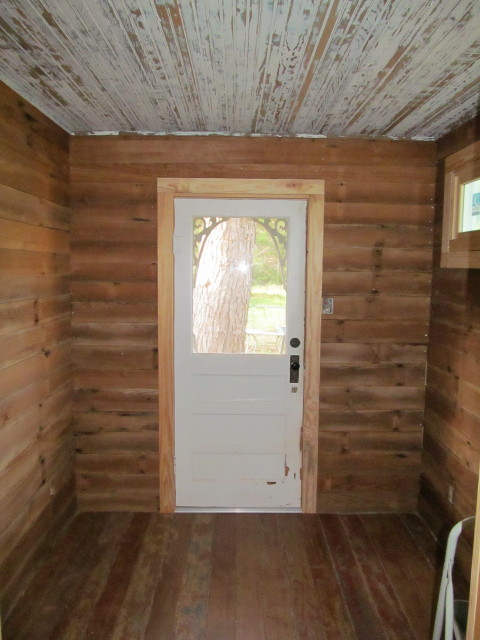
The shiplap walls were installed and then the beadboard ceilings.
What we were left with was a very cabin-y looking room.
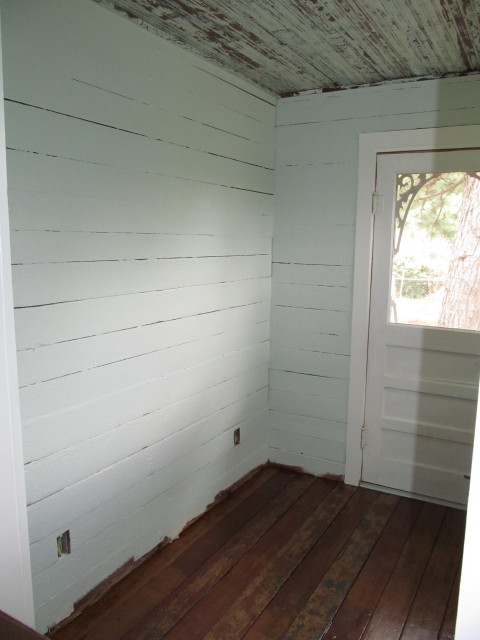
After much debate with my husband (who loved the bare wood), I decided to paint the walls a barely blue color from Sherwin Williams.
I also polyurethaned the floors …
… and the ceiling.
This is always a super fun process because poly really makes the colors pop!
By the way, the light is from Home Depot or Lowe’s. I can’t remember which. It has a vintage style that I like. It works for now. I may eventually replace it with a vintage fixture.
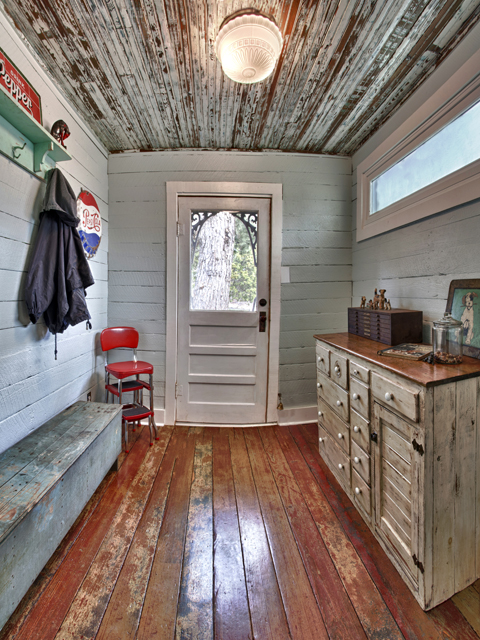
Didn’t she turn out so pretty?
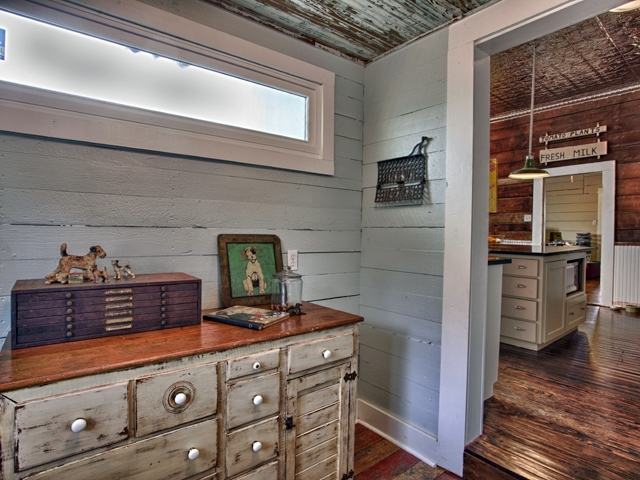
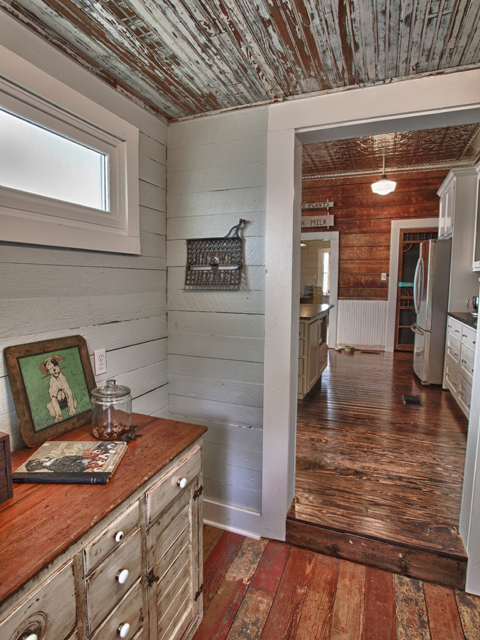
I bought the yellow cabinet at an antique store in Georgetown, Texas that closed down years ago. (I really did get upset when that happened.) I used it as a dresser in my previous home in Austin, and used it briefly in our guest bedroom here.
Now, it’s happy to live in the mudroom. It’s used much more frequently now. It’s so perfect for storing dog leashes, cleaning rags, tools, shopping bags, phone books and such. Plus, it has a large countertop — always convenient for setting things down when coming in or going out.
(You can see glimpse of our remodeled kitchen in this photo. I’ve written about the tin ceiling project, but the entire kitchen remodeling post will come another day.)
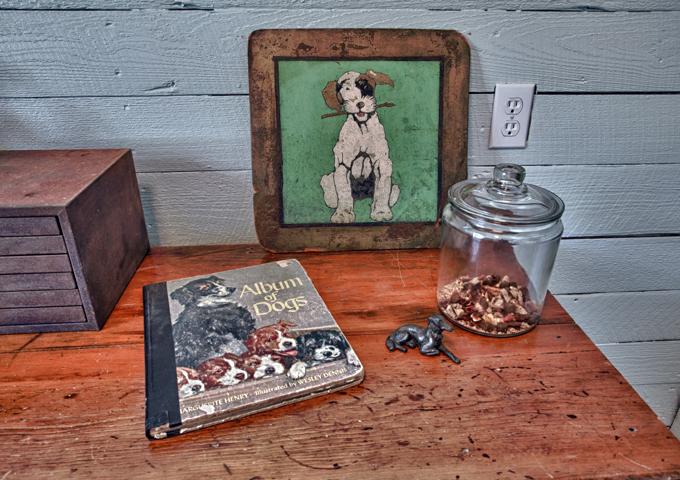
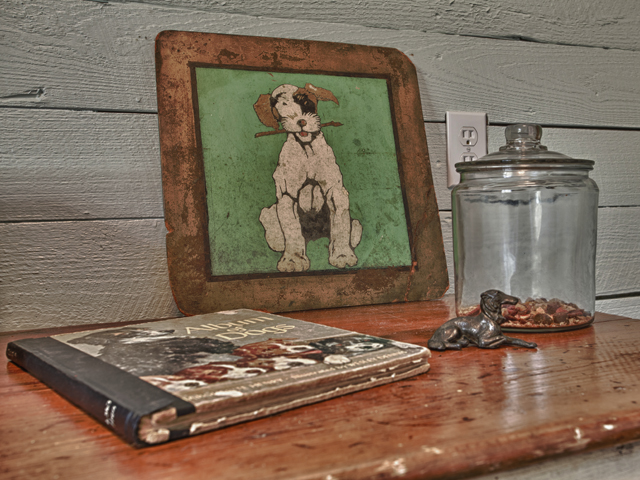
On it I’ve displayed some antique dog collectibles and a glass jar of dog treats (so handy when enticing our two dogs to come in).
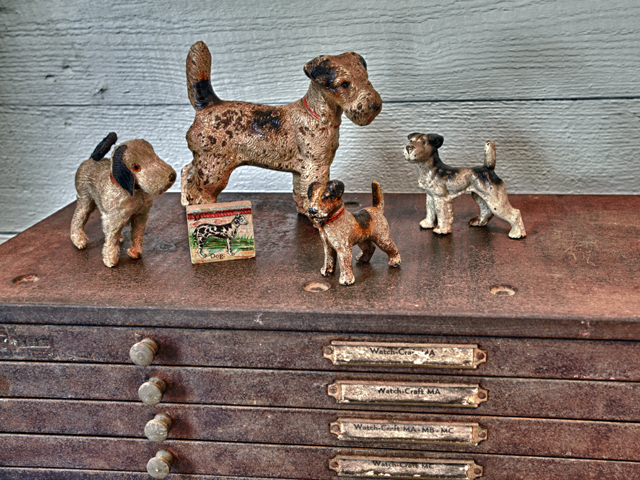
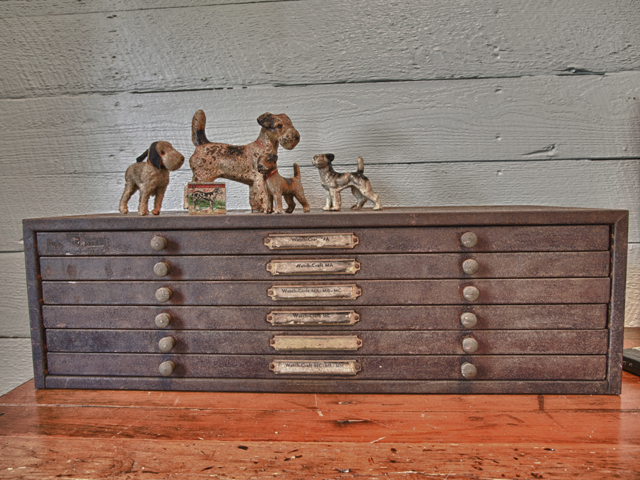
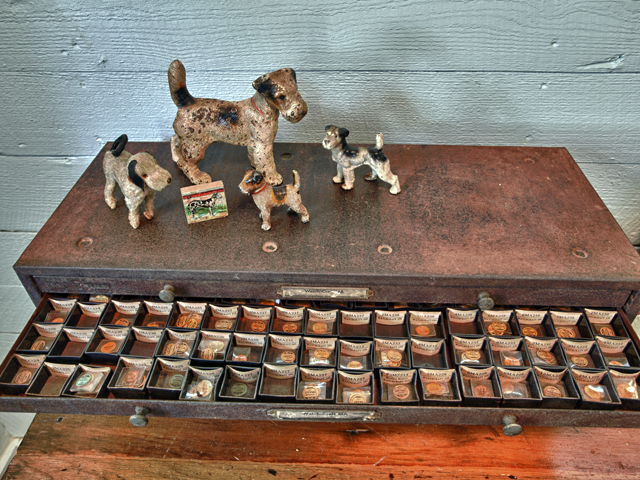
I also displayed some of the dog collectibles I LOVE on an old watchmaker’s cabinet that I’ll be listing on Etsy soon.
The “New Home” iron piece to the left of the kitchen door is an old sewing machine pedal that I received as a Christmas present.
Our old dog trot home was built in 1853, so it’s certainly not new, but it’s new to us.
(By the way, you may have noticed that there is plastic over the transom window. That’s because we’re still painting the house siding and trim! It’s rainy season here, with rain storms resembling monsoons sometimes, so that project has been delayed. And let’s not talk about the painter we had to fire.)
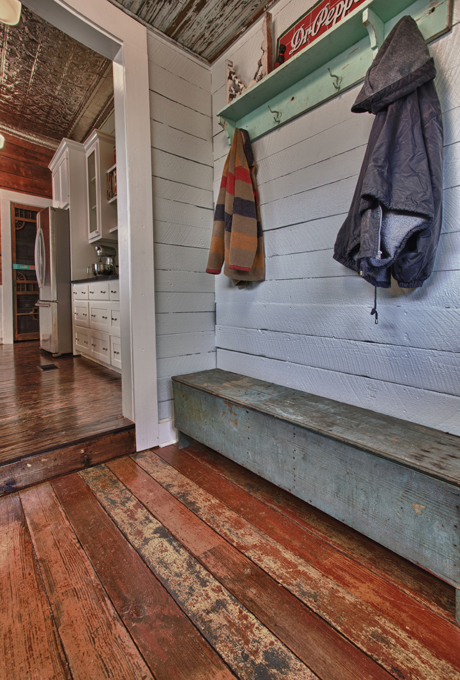
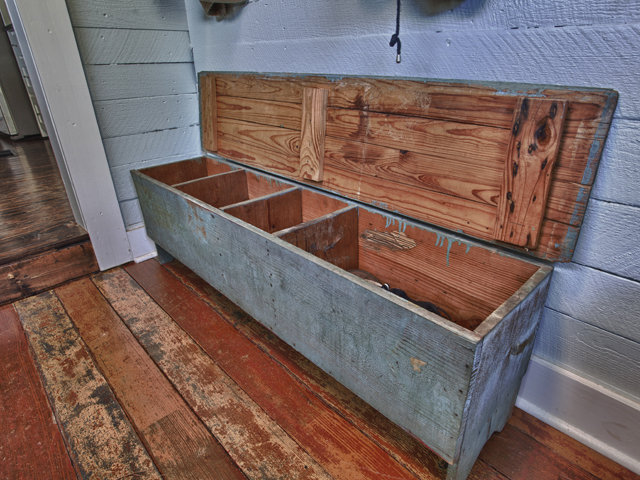
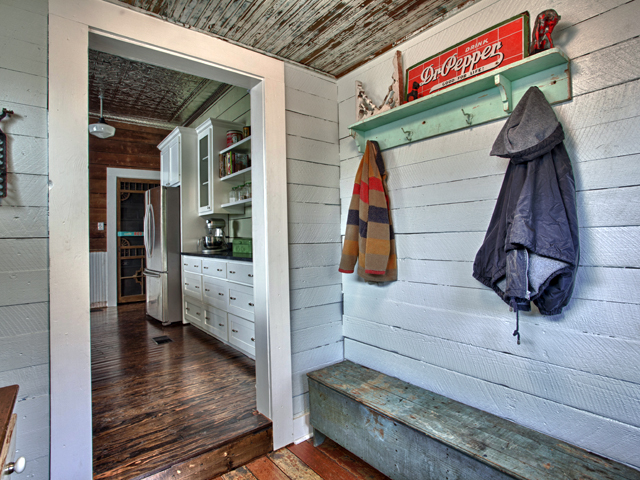
On the opposite wall, we have the antique bench that we purchased from a dealer at Ye Olde City Antique Mall in Tyler.
We knew the moment we saw it that it would be perfect for our mudroom. The blue color is gorgeous and fits the room’s color palette, and the top lifts up for ample storage for shoes and other things.
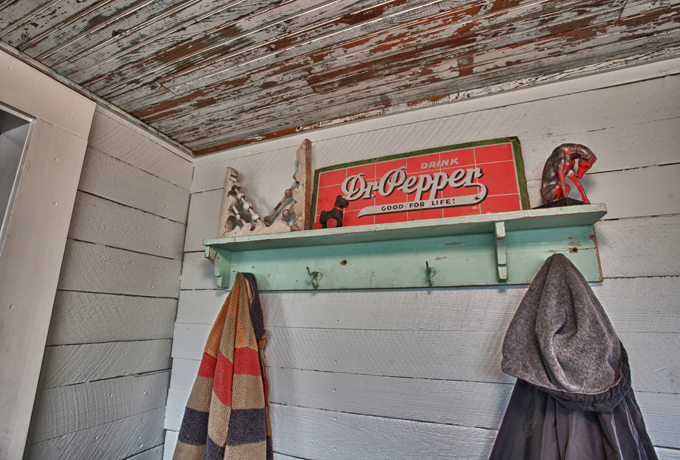
Above the bench is an old, green coat rack that I’ve owned for years.
Have I said recently that I love the floors?
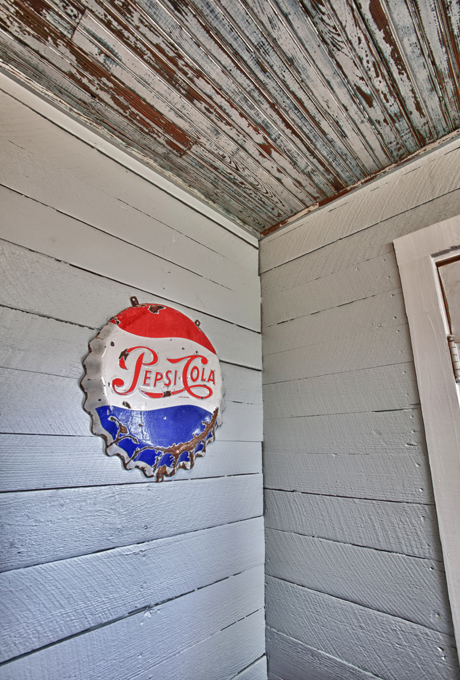
I collect old signs, too, and displayed one of them here …
I hope you have enjoyed seeing our finished project. Please let me know what you think by commenting below .. or visiting Living Vintage on Facebook.
******************************
I’m linking to these parties:
Anything Blue Friday @ The Dedicated House
Throwback Thursday @ Girl in the Garage, Restoration Redoux, Glitter, Glue & Paint, Sweet Pea, An Alli Event, and Inspiration for Moms
This project came out beautifully! I love the floors and ceiling and agree with your decision to paint the walls. Now to scroll back up and look at all those photos again….
Awesome! Glad you liked it. Have fun looking around. Many more blog posts to come …
Wow, your mudroom is just perfect for your house! I love all the little decorative touches you’ve chosen and the way y’all finished all the wood to look like it has been there. I see you are in Texas…we are too. I’m going to snoop around your blog a little more. 🙂
Stacey, thank you so much! Please do snoop away! 🙂 I will definitely check out your blog also!
I’m excited to find this web site. I want to to thank you for your time just for this wonderful read!! I definitely savored every part of it and I have you saved to fav to check out new information on your web site.
What an amazing creation! Great job! Also, I love your vintage pieces – very sweet!
Thank you. Very sweet of you to take the time to say so. Feel free to repost on your site if you like. 🙂 I’ll check out your site also!
Absolutely beautiful !!. Inside and out, congratulations !!!
Thank you! 🙂
AWESOME !!!!!!!!!!!!!!!!!!!!!!!!!!!!!!!!!!!!!!!!!!!!!!!!!!!!!!!!!!!!!!!!!!!!!!!!!!!!!!!!!!!!!!!!!!!!
This is an amazing mudroom! What a fabulous and thoughtful job ya’ll did! Practicality and beauty together in equal parts. Congrats on creating a sand-free home and added square footage to boot! 🙂
Thank you so much, Alie. I’m really proud of the way it turned out and so glad we decided to move forward with our project. Too, I can’t imagine remodeling or constructing anything that’s not functional and pretty at the same time.
Hi Kim,
I absolutely love your mudroom! From the floors to the walls to the bench. It’s all fantastic! You and I have such similar taste. You would probably enjoy my renovated kitchen which Julia posted on her Hooked on Houses kitchen contest in November. I think she titled it: Renita’s kitchen goes back in time. In any case, love old signs too. Being a dog lover also, I wasn’t sure when I read your post whether you are going to sell some of your dog items on Etsy or just the watch cabinet. Please let me know as I am always interested in anything dog!
Thanks,
Renita
Renita, thank you so much! I’m glad you like it. I searched Hooked on Houses and I found two postings for you: one for your kitchen and one for your dining room. I LOVE them! The floors in your kitchen are amazing, and I love your little pantry. Your Thanksgiving sign is superb. I will have to post the photos and the link to my Facebook page. I’m sure others will love to see it.
Concerning your question, I’m selling the watchmaker’s cabinet, not the dogs. I’m a huge dog fan also, and I can’t part with them.
I don’t blame you! Thanks.
Only a fellow dog lover would understand. 🙂
By the way, I just shared your kitchen photo on my FB page: http://tinyurl.com/aschn5c. People are liking it.
Hi Kim,
What color did you use on your mudroom walls (the blue)? Also, where did you find such great flooring?
Thanks,
Renita
We used Sherwin-Williams’ Topsail color. Here’s the link: http://www.sherwin-williams.com/homeowners/color/find-and-explore-colors/paint-colors-by-family/SW6217-topsail/.
Also we salvaged the old floors from an old house we partially demo’d. The story is here: https://www.livingvintageco.com/2012/09/a-funny-story-on-how-we-stumbled-into-the-old-house-salvage-mining-business/. The old floors had been painted multiple times over the years by the owner’s grandmother. I originally thought I would want to sand them all the way down to bare wood, but when I started the sanding process, I loved the color variety so much that I decided to leave them that way. I imagine there are some architectural reclamation places near you?
LOVE it! What a clever bunch of people 🙂 I’m doing a mudroom in our renovation and am looking for all the inspiration i can get. We don’t really do mudrooms here in Australia, but we desperately need somewhere to dump school bags, shoes, sticks we might like to deposit in the house…. 😉
http://ashiplaphome.blogspot.com.au
Mudrooms are perfect for what you have in mind, Laura. You might want to check out my mudroom board on Pinterest as well: http://pinterest.com/LivingVintageTX/mudrooms-and-entryways/. Good luck with your project!
This turned out great! We too are planning for a small mudroom addition :0) Curious as to the dimensions of your new space..I always have a hard time guessing. Do you find it roomy enough?
Great Job!
Thanks, Brandie. Our mudroom is 8′ x 8′, and we feel it’s plenty big enough. Good luck with your project. Please email me pics when you are done with it. I’d love to see it.
Fantastic, makes me want to buy an old house to attach a mud room to. My garage goes straight into the house. I wish we could have a mud room in Texas too.
Love EVERYTHING about your new mudroom . Fantastic job!
Suzanne
Thank you so much, Suzanne!
I LOVE LOVE the floors and ceiling! They look amazing and that whole project looked like so much work. Totally worth it though and you did a fabulous job accessorizing! Michele
Thanks so much! It does my heart good to know that others appreciate what I’ve accomplished.
I’m in love with every inch of your room! Love it 🙂
Debbie
Awww! Thank you so much!
I love those floors. I keep looking over at my old wood floors and wondering if I could scratch a dab of color here and there, and then shine them up. Good eye candy you have there.
-Angie
I have never been brave enough to paint wood floors, but glad that we salvaged these old floors which already had existing paint. Glad also that you enjoyed the post, Angie!
I just came across your site via Miss Mustard Seed. I love that you just added a mud room and we just took one off our house… but I’m so taking your inspiration into our foyer. With an circa 1760 16 room house I saw no need to keep the dilapidated add-on 17th room, when we took it down to rebuild with permits and plans in place, I saw our house in a whole new light and put a halt to building it back. I LOVE YOUR SENSE OF DESIGN STYLE and family values. I’ll be reading you further post in awe. PS I love a man in work overalls.
Ironic, isn’t it. I never thought I’d need or want a mudroom! Happy that you liked it. I’d love to see photos of your 1760’s home and your completed project!
Wow! great job. love the finishes and well, everything about it. Little Bit from http://www.DecorateWithaLittleBit.com
Thank you so much! Very sweet of you to say so.
Just found you & the mud room is Awesome great job love love love it ….
Thank you!
What a great space! I love all the details…the vintage signs, that blue bench…wow! Great job. 🙂
Thanks so much, Anu!
Awesome, your room looks great!!
Shawn, thanks for your comments. Glad you liked it!
Stunning! This is my first visit and now I am your newest subscriber!
Awesome!!! So happy that you decided to subscribe.
Wow, every detail was thought out.
SW paint was perfect for the walls. Great job.
Debbi,
Yeah, I have a tendency to overplan sometimes, rather than just jumping in. I guess you could call that good or bad.
I’m a huge fan of “barely there” colors. We tried painting our home with some paint we bought at a big box store, and I told my husband I would never use it again. It just didn’t cover worth a flip. SW’s paints are well worth the extra money, and I always try to buy it on sale.
p
Anyhow, thanks for the feedback! Glad you like how our little remodeling project turned out.
Kim
OMG-those r the most amazing floors i have ever seen–i want them…badly…the ceiling is perfect as well and so is the rest of the furniture-it all came together like a song…but those floors…oooohhh
I’m really happy with the way they turned out and I’m glad I didn’t completely remove the color like I first planned.
I just found you, thanks to Miss Mustard Seed. I am in love with this mudroom and I will be adding your blog to my list of favorites. I intend to go back and look and yes, read all you other posts. I think I’ve found a new best friend !!!!!!
Thanks so much! Glad you like my style, and glad to have you as a new friend.
Can I move into your mudroom? I just love this project and the cozy cabin feel of your room. So charming, beautiful, just wonderful! Can’t wait to look at the rest of your blog. Stopped by via Miss Mustard Seed and am a new follower for sure!
Thanks so much!!!!
This is fantastic. I love how it all look so time worn and original. I love all your finishing touches. I’d love you to share it over at Silver Pennies Sundays Link Party – http://www.findingsilverpennies.com/2013/02/silver-pennies-sundays-link-party.html
Yes, there’s no way I would have built on a room that didn’t match the style of the original 1853 home. And thank you! I will do that.
So glad you shared it! I love how it came out. Fantastic!
Thank you, Danielle!
oh my …I am so crushing on this! Everything about this is amazing!
Thanks! We love it and are so glad we decided to move forward with the project.
LOVE!!!! EVERYONE better “WIPE FEET” before entering – wondeful job!! franki
Thank you, Franki!
Wow, amazing, this is absolutely gorgeous!
Thank you so much, Karen!
Amei sua vintage,ficou simplesmente lindo!
Muito obrigado, Jane!
Amei sua obra de arte,simplesmente lindo;que DEUS os abençoe para curtirem sua nova arte!
I simply want to tell you that I’m all new to blogging and site-building and certainly savored this web page. Most likely I’m planning to bookmark your website . You absolutely have fabulous well written articles. Thanks a bunch for sharing with us your website page.
Oh my adorable! I LOVE this whole space. All the vintage woods, textures, paints are fab together! I’d love to share this on Burlap & Denim.
Glad you like it. Feel free to share, Amanda. 🙂
You have such awesome content. I have need it a long time finally i have got it.. Thanks…
Hey there, You’ve done a great job. I’ll definitely
digg it and personally recommend to my friends. I’m sure they will be benefited from this website.
I just love this addition. Those floors are fabulous. Good move painting the walls. Really brightened it up.
Thank you, Kim! I’ll definitely be entering my mudroom in your party one week. 🙂
Hey, I was just here not too long ago, visiting wall shelving that was really heavy I believe! I think I’m going to be back a lot, I love this! You would never know this is a brand new build!! So much charm and character, you guys did an amazing job! XO
Christy, thank you so much! I hope you do. By the way, our house is actually a very old dogtrot — originally built in the 1850’s — but we have completely remodeled each room, gutted the siding and blown in insulation, built on a new mudroom, etc … so it’s almost a new (very old) house!
Kim, it’s fantastic! You guys did an amazing job! You are one of the features today at the Anything Blue Friday party at The Dedicated House. Pop on in and grab a feature button for your blog. Here is the link to this week’s party. http://thededicatedhouse.blogspot.com/2013/09/anything-blue-friday-week-25.html Hope to see you again at the little blue soiree. Toodles, Kathryn @TheDedicatedHouse
Thank you so much, Kathryn!
This is so incredibly beautiful! What a fantastic job with every detail. Oh. my. word.
Denise, I’m so glad you like it. Thanks for stopping by!
Love the mudroom, everything about it, the beautiful floor & ceiling, the old furniture & the collectibles. I’m amazed how beautiful the floor & ceiling looks. Keep it up…
Thanks, Cliff! We intend to. 🙂
Any problems with the addition settling after it was built? We’re looking to do the same thing on our mobile home and I’m worried about the roof leaking.
No, sir. We haven’t had any settling problems.
Simply beautiful. I love it!
I love it! The floor is beautiful and the everything fits together so well. Awesome job.
FABULOUS!!!!!!
I love the rustic style of your mudroom and with that I had one in my home. Thanks so much for sharing with this week’s Throwback Thursday party.
I Love Love Love everything about this room! Everything looks so gorgeous together- you guys really did a great job. Thanks for sharing this at Throwback Thursday!
Thank you, Jen. From a handy girl like you, that means a lot.
Kim !!
Wow !! Wowsers !! I just adore it ! Love all the colours that shine through the layers of the wood. I totally LOVE recycling and working with reclaimed materials too.( you probably already know that from our adult sized treehouse made from all reclaimed materials) … on my bloggy. I am so happy I found your blog. It’s d’bomb dot com !
Lynne
If there was a treehouse award (and there should be, durn it!), your tree paradise would win. I just know it.
OH My.. I am loving your home and can’t wait to look at more of your posts. I could live in your mudroom. Just love it like crazy. You did an amazing job. Wow. I have a very teeny tiny 8′ wide and 24 foot tiny home that I have filled with vintage flea market and curbside finds. It is so cool to bring the old into the new and create a sweet new space. I want to build a bench like you have in the mudroom. Great ideas and inspiration here. Glad I found your amazing blog.
Tonita @ http://www.ShabbyChicTinyRetreat.blogspot.com
Tonita,
Thank you so much! You must love color. We certainly have a lot of it in that room. I’m normally a fan of more muted colors, but let my hair down (so to speak) in smaller rooms.
I glanced at your blog, and it’s so ironic that you found my blog and commented because building tiny (and little) houses is one of the goals of our business, using vintage materials.
I will definitely dive into your blog more thoroughly as soon as I possibly can!
Kim
Very good blog post. I certainly appreciate this site.
Thanks!
Just found your site and plan on spending the night here, haha. Going to be starting some renovations myself (first time home owner–and just so). But WOW, this room is amazing! Do you mind if I ask how much you ended on spending to do the mudroom?
Blair,
I think the final cost was around $5,000. Have fun looking around! 🙂
Kim
This site was… how do I say it? Relevant!! Finally I’ve found something which helped me.
Cheers!
LOVE IT!! Can you tell me the size of the bench? How long, tall, wide it is? I may try to build one out of barn boards!
Jennifer, our bench measures 5 feet long x 13 inches deep x 18 inches tall. Hope that helps!
Hi, I so much love the mud room , as we are one day gonna add one on to our home, I LOVE ALL THE OLD WOOD AND BOARDS AND ANYTHING AND EVERYTHING FROM RETRO TO VINTAGE TO REPURPOSE TO ANTIQUE AND ALL IN BETWEEN, It is such a delight for me when I see how people have re-used this stuff and the many things that they also make from it . I been told that I have to watch out for ”lead” on any painted surfaces from back from 1970’s that it can be harmful . any suggestions on what you do for a test if you do any at all for lead in the paint that is left on the boards…To me I think it looks so awesome , but I just don’t like the time to have to scrap it all off if it is lead base paint from the 70’s and on .I would rather leave it on it , But if I make something out of the wood with the old paint on it , Do I have to tell the customer that it has lead paint on it ? LOVE IT ALL, THANKS SO MUCH LINDA
Linda, thank you so much! Yes, you do need to watch out for lead. There are lead testing kits that you can buy to test for lead. If lead exists, please do take all the necessary safety precautions with the wood. If/when we find lead on old wood (and even if we don’t) we always apply 1-2 coats of clear polyurethane to the wood to protect from lead and to keep the paint from flaking off any further. Hope this helps!
Looks awesome.
Two things.
1. Do you have a pic of completed project from the outside. I would love to see how you incorporateed the existing French doors.
2. Can you build me one., same specs.
Jerry,
I can, of course, provide a photo, but I want to be sure you’re looking at our mudroom? Our mudroom does not have French doors. The only thing we’ve built that has French doors is Jenny’s shed. Also, where do you live?
Kim
If you would link back to my site within the post, I’d appreciate it. Thanks for loving my mudroom!